What can I do with levels ?
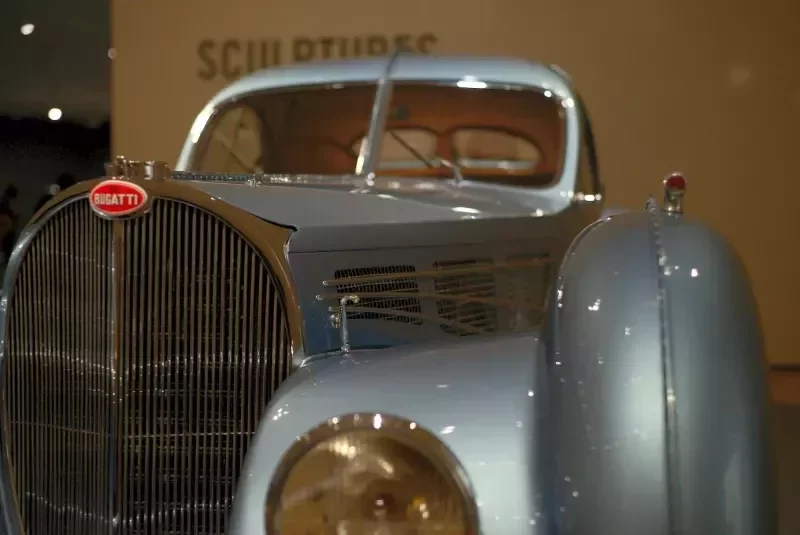
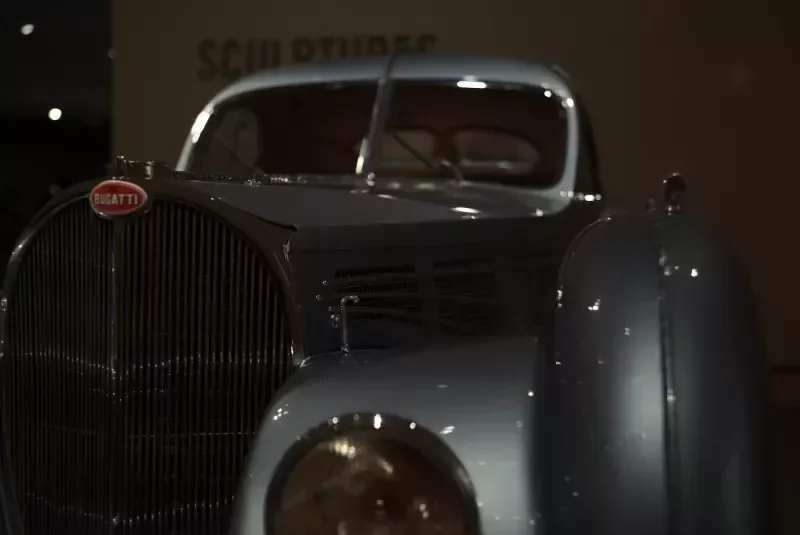
This photo was too dark ? See how it is brighten in under 2 minutes !
Which softwares ?
Levels can be adjusted in Photoshop, but I would suggest you to try these two:
- Darktable -> purely use as a photo editing / post processing tool. It is the free and open source equivalent of Adobe lightroom.
- The Gimp -> free and open source software which is the equivalent of Photoshop. It is used in combination of layers with some painting capabilities
If you are not sure about how to use layers, I would advise you to try Darktable, which has also a easier way to rollback changes in history of modifications applied to an image.
In short, what to do with levels ?
Simply put it "switches the light on" or off
Level is a photo editing tool which lets you ajust distribution of complete white, grey (midtones) and complete black across a picture, this will in turn change the perceived brightness in certain areas of the edited photography.
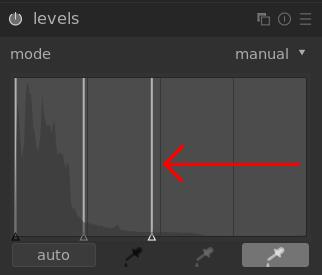
This red arrow pushing the white cursor from the right to the center ? Basically you will try to fill in the empty space (the lowest filled vertical space) in the histogram, which will result on a more balanced overall distribution of the brightness in the picture, it is quick and efficient.
How do I read levels ?
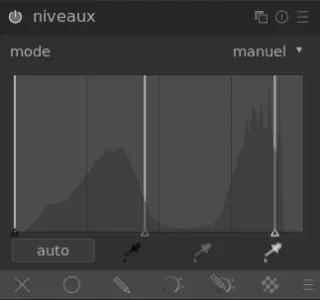
The next histogram is part of Gimp's level adjustment tool, it is showing the distribution of light between the most black and white points.
The following picture is a screenshot of Gimp level adjustment histogram. Colors are not taken into account.
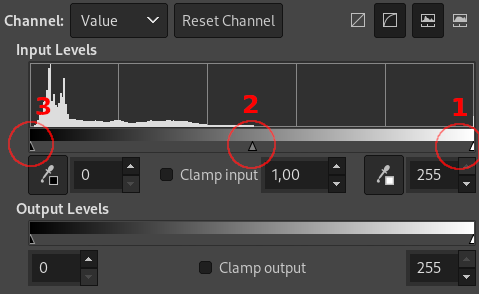
Cursor 1 represent the repartition point from pure white pixels, on to cursor 2 which represents midtones, progressively to the left until cursor 3 which is the distribution of pure black pixels.
For the purpose of this article, note that we are focusing on input levels adjustment (the only one available in Darktable).
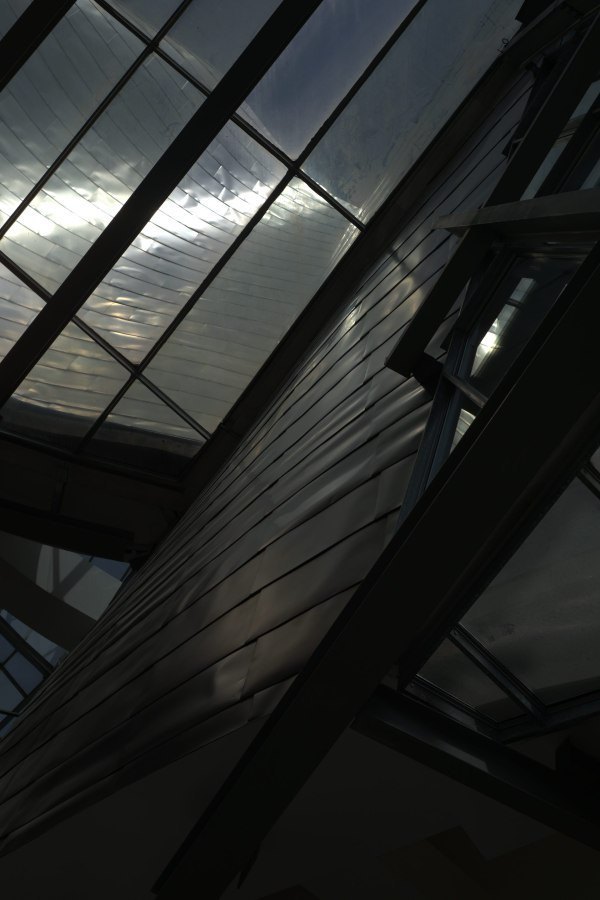
Gray is not black.
Notice that in the following image, while lots of area in this photography are looking completely black, this image has actually lots of details hidden toward black points of the image.
How to use levels
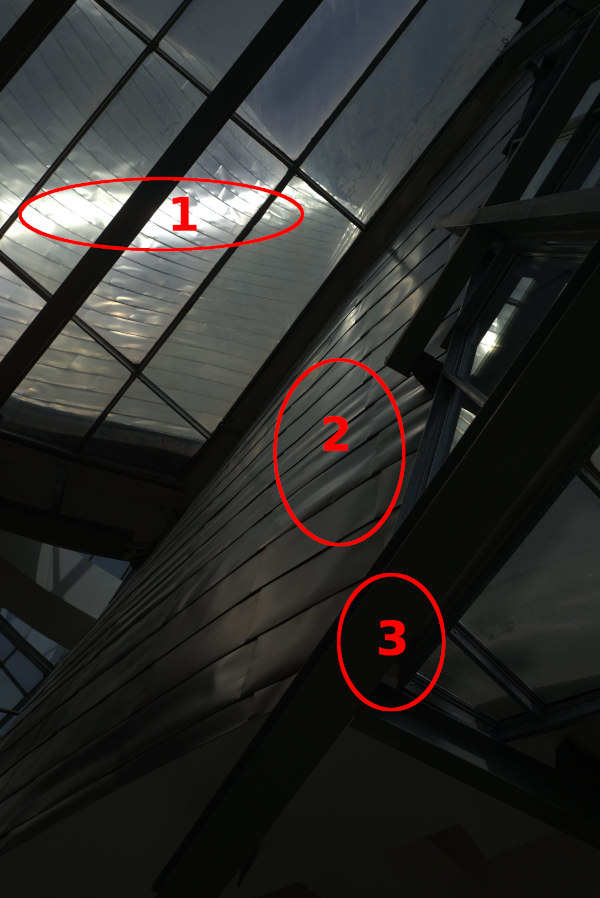
1. Starting with the rightmost part of the histogram, you can see the distribution of white points which is almost inexistent except for the white sky light rays.
The marker n°1 above represent pure white space and decrease toward gray as these points on the histogram advance toward the center. Increasing brightness in this way erases details in the lightest parts of the picture, progressively replacing pixels with pure white.
2. From the center to the left of the histogram, is represented gray shades across the picture, called midtones. you can see their distribution around marker 2. Mid-tones can be moved with the center cursor toward more whiteness or blackness in the picture, which tends to make bland colors but could reveal hidden details.
3. When the leftmost cursor is moved toward the right of the histogram, distribution of pure black will become more dense, resulting in more darkness, in a comparable way that moving the rightmost cursor toward the center will create more light.
Quick edit showing several layers of adjustement