
In another article, I wrote about the central aspect of photography as a mean of drawing with light, bear with me as you keep this in mind, before mastering your camera's manual mode, and learning how to manage advanced camera settings, it is necessary to grasp the fact that when you take pictures, you are, in fact, composing with light at all times.
Exposure value
<insert camera picture here>
How does a camera handles light ?
Every modern camera has a built-in metering sensor mechanism which can detect the amount of light in sight and so will adjust settings accordingly, or at least will suggest you what to do, even if you activated manual settings.
On digital cameras, this measurement will show up somewhere on a lcd display as the Exposure Value (EV) relative to your current lighting conditions.
Even on a phone or an old cheap compact camera, your camera is constantly trying to measure the amount of light outside and you can also adjust it manually.
This is most often shown as a cursor positioned on a bar or as number relative to 0, zero being the optimal exposure value for your current environment, selected by your metering sensor.
Exposure time
<insert camera screen settings here>
Exposure time will affect the amount of light touching the sensor. You can easily imagine that the more exposure time, the more light go through your lens onto the sensor and in turn will make the picture brighter, or conversely darker when exposure time is reduced (faster).
Do you remember of the last time you tried to take a photo with your phone in low light conditions such as an evening, night or room without much light ? As you were moving your camera trying to find your frame, motion stutter was occurring, the video preview was actually slow, reflecting the idea that more time was necessary to process the information, exposure time was becoming relatively higher.
‟the more exposure time, the more light go through your lens onto the sensor”
What camera mode am I using ?
<insert camera picture here>
Switching from auto to 100 % manual → a beginner mistake
When you start to understand how the three elements from the triangle of exposure (aperture, exposure and iso) are used to balance lighting in a picture, you might very well be tempted to start using manual mode right away and to experiment with it. This is indeed a good way to become more familiar with your camera settings, buttons and dials. However, while I did it myself and many others persons I spoke to, in the long run it is not optimal to rely solely on the full manual mode, and is neither the way professional are doing most of the time.
Why not using full manual mode ?
Let’s say you are photographing a sport event, or bird flying, and want to change exposure time to freeze the moment with the less possible blur, you don’t have much time because soon the moment will be lost. As you reduce exposure time, the exposure value (in other word, relative light of you photo) will also be reduced. You would probably also have to adjust your aperture and / or ISO setting to keep up the exposure value corresponding to a clear picture, however, by thinking and adjusting all these three manually you are loosing precious time and the bird or action will be gone.
The Exposure Value to be chosen is also changing constantly, thus making it difficult to track manually, quickly at all time. Changing one element of the triangle separately would alter the amount of light received by the sensor, although you often want a balanced exposure in your photograph, not overexposed, nor underexposed. To achieve a smooth transition between parameters, each of the 3 elements of the exposure triangle can be adjusted separately in a semi-auto fashion, where 2 parameters will be adjusted automatically and 1 will be manual. The semi-auto mode is called by a parameter's priority.
Any advanced camera have in between modes corresponding to this « triangle of light », that you can use depending on your current situation.
Aperture priority
<insert small photo here>
This mode is used when you want to have control over how sharp your image is and how shallow your depth of field is.
We have discussed how aperture is affecting the blurriness of your background, sometimes referred to as bookeh, indeed, biggest apertures (which would be low f-numbers) are reducing the sharpness area around your focus point, at F5.6 or lower.
High F-Stop number are used to achieve more sharpness. landscape for instance are often shot at lower aperture, in other word f11 or more.
Shutter speed priority
<insert small photo here>
Given priority to shutter speed is the way to go for picturing fast or conversely slow action.
It is said that to achieve an acceptably sharp image, you have to choose a shutter speed above a fraction of twice your focal length on a small sensor.
Formula: blurry shutter speed < 1 / (focal length x 2)
For instance if you use a 50mm length on a mirror-less camera, then you would choose at least a speed of 1/100s, for 200mm 1/400 and so on. Not only it is harder to avoid hand shake while holding and handling long lenses, it becomes clear how tele-objectives (focal length of 150mm+) are more prone to subject motion blur.
This calculus is of course very subjective but will nonetheless help you avoid both camera shake and subject motion blurs. as camera shake and subject motion speed are otherwise hard to quantify.
Sometimes, you will conversely want to use 10 seconds or more exposure time, when your goal is to inprint movement on one single image in a surrealistic or artistic way. The practice of light painting (art form involving tracing ray of lights) is making an extensive use of this. To achive this kind of picture, you will absolutely need a very stable camera mount such as a tripod, as camera shake would otherwise induce too much blur in your picture.
ISO sensitivity
<insert small photo here>
There is no ISO priority mode, in fact, on many cameras, moving ISO by hand instead of using the auto ISO setting will result on unpredictable ligthing in your image (that is, not previewed correctly on your display or viewfinder). For this reason, it is almost always possible to specify the max range of ISO values your camera will use with the ISO auto setting. Depending on the age of your camera, you will be able to use a higher ISO setting with less noise. Each new generations of camera is coming with better quality (less noise) at a high ISO setting.
For instance, I use the following settings for ISO auto mode on my different devices :
| Type of device | ISO Auto max recommended value |
| Fullframe, big sensor, or APS-C with low noise | 6400+ |
| Mirrorless camera, micro four third, small sensors | 1600+ |
| Smartphone, old camera | 800+ |
That being said, a higher ISO will always impact negatively the quality of your image (even slightly). Also, your camera will most probably often tend to give a higher exposure speed and so to use your max ISO auto value for that.
Here is my advice : set your camera in ISO auto mode and adjust its max value depending on the situation to find balance between speed and image quality. A good camera will give your quick and direct dial access to the iso auto max value.
By setting your ISO auto max value you will effectively choose what ISO will be used in practice, even more because you will probably never want to introduce noise on the picture by purpose, so that if your camera decide for you it can be lower that your max, the better !
In practical terms, it means that if you want to favour speed over image quality or to introduce digital grain, use a high iso max value and vice versa.
<show before after iso here>
Conclusion
When to use full manual settings
Use aperture priority if you favor bookeh over action or shutter speed priority if you need to freeze motion, always keep ISO on auto.
Play with full manual mode only for the purpose of learning or if you have unlimited time to setup your camera with much precision, let’s say for a particular landscape or fixed subject, preferably on a tripod, with a remote.
Environmental conditions are changing all the time so unless you always take photos in the same situations, you cannot realistically have time to freeze unpredictable events and finely move aperture, exposure time and ISO yourself all at the same time.
See also : exercises to learn settings for manual photography.
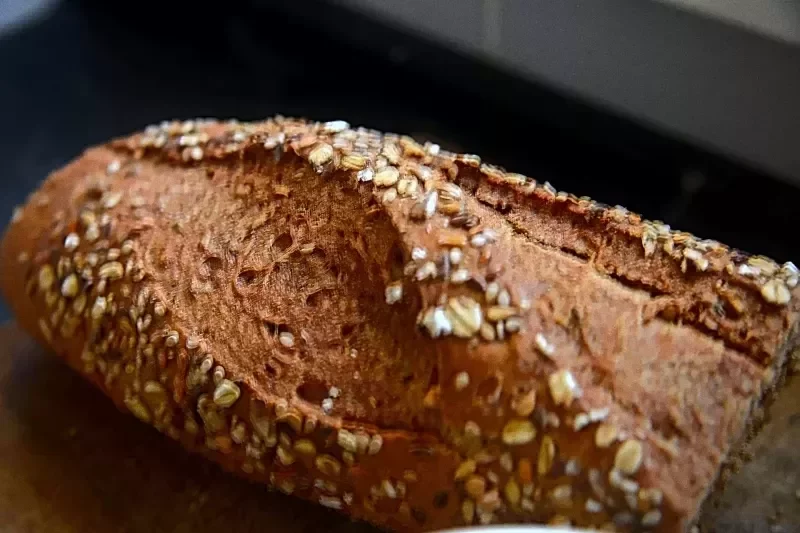

Blurry photo fixed with sharpening techniques
This photo was taken in low light settings at a slow shutter speed with a wide aperture, which is prone to camera shaking.
Also, the bread has many details which became blurry not only because of camera movements, but also because ot the shallow depth of field.
You can see the before / after differences and how it has been improved to the extend of looking sharp.